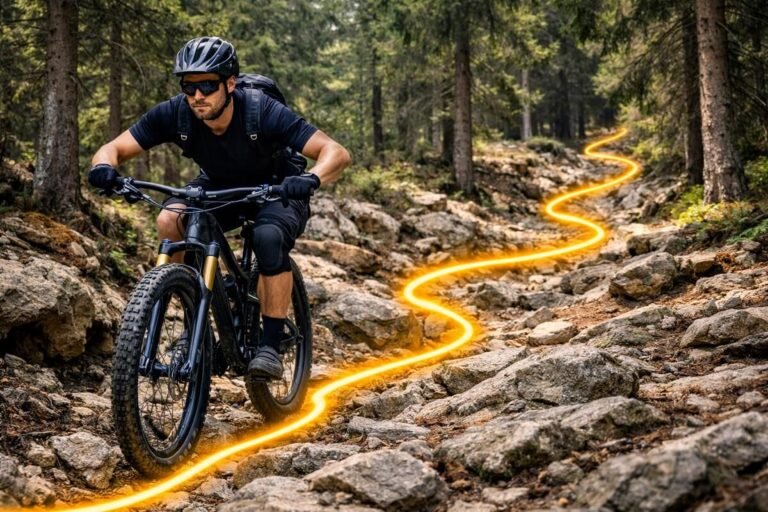
MTB Trail Signs and Ratings Explained
Ever bombed down a trail only to realize halfway through that it’s way above your skill level? Or maybe you’ve skipped a trail that looked gnarly but was actually beginner-friendly? That’s where MTB trail signs and ratings come in — they’re not just colorful shapes nailed to trees. They’re your trail survival guide, your confidence booster, and your injury prevention system all rolled into one.
Whether you’re a weekend warrior or a full-send shredder, understanding mountain bike trail ratings is essential. These signs — like the green circle, blue square, and black diamond — aren’t just decoration. They tell you everything from technical difficulty to terrain type, trail flow, and even recommended gear setups. And yes, if you’re wondering how to maintain your dropper post, knowing the trail rating helps you decide when and how often you’ll be using it.
Here’s the kicker: most riders think they know what the signs mean… until they hit a double black diamond and realize they’re in over their heads. This guide breaks it all down — from IMBA trail rating systems to bike park signage, regional variations, and real-world examples. We’ll even cover gear tips and trail etiquette so you can ride smarter and safer.
Ready to decode the trail? Let’s roll.
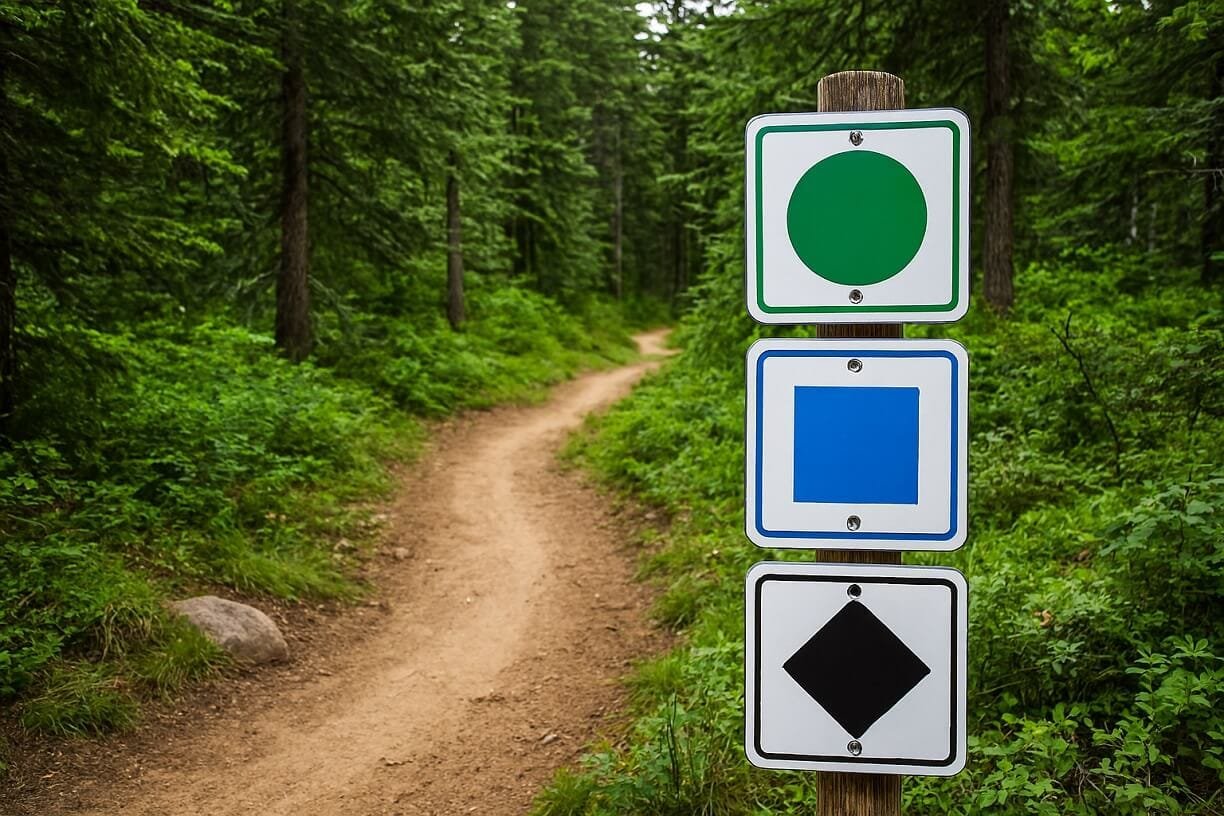
🧭 Understanding the MTB Trail Rating System
If you’ve ever stared at a trailhead sign wondering whether you’re about to cruise or crash, you’re not alone. The MTB trail rating system helps riders make informed decisions — but it’s not always intuitive. Let’s break it down.
🟢 Green Circle — Beginner Trails
These trails are arranged for riders who are new to mountain biking or prefer a relaxed ride. They offer a fun and safe way to build confidence on two wheels before tackling tougher terrain.
What to expect:
- Wide and stable paths: Green trails are wider than intermediate or advanced routes, giving riders plenty of room to maneuver and maintain balance.
- Minimal obstacles: You’ll rarely find large rocks, roots, or technical features. Most surfaces are smooth dirt or crushed gravel, making it easy to focus on basic handling skills.
- Gentle grades: The climbs and descents are mild, which allows beginners to get used to pedaling uphill and controlling speed on the way down without feeling overwhelmed.
- Predictable terrain: Turns are gradual, visibility is good, and there are no sudden drops or blind corners. Everything feels consistent and easy to anticipate.
- Perfect for learning: These trails are great for kids, families, or anyone easing into mountain biking while improving balance, braking, and cornering techniques.

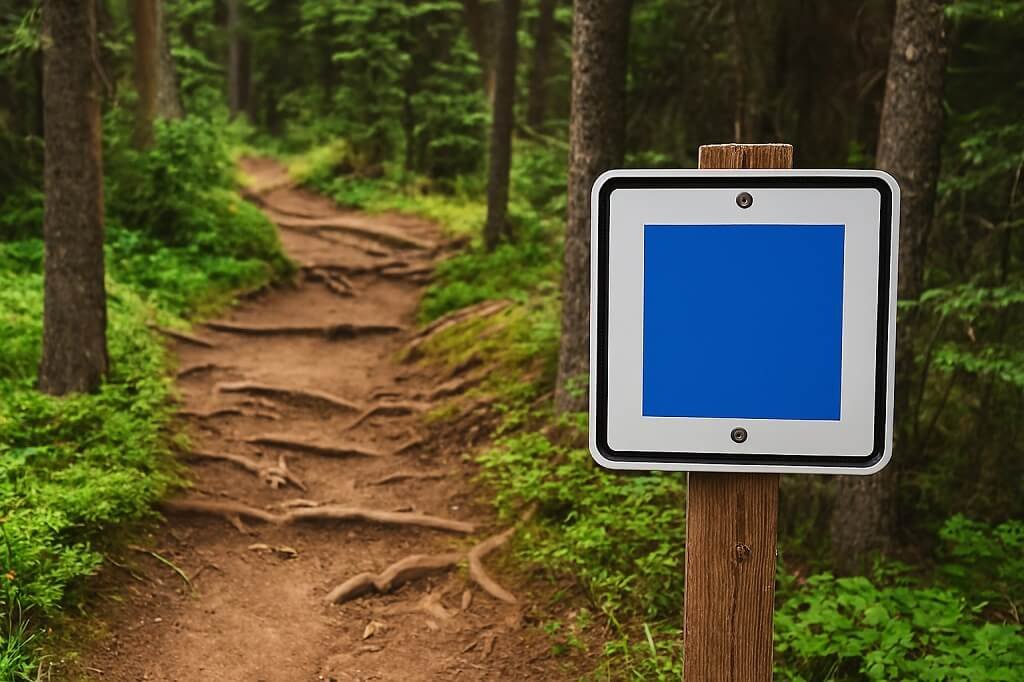
🔷 Blue Square — Intermediate Trails
Once you’ve mastered the basics, blue trails are the next step up. They introduce more variety, challenge, and fun — perfect for building skills and confidence without venturing into expert-only terrain.
What to expect:
- Moderate technical features: You’ll encounter small roots, rocks, rollers, and berms that add texture to the ride. These features help improve your bike handling and balance while keeping the trail exciting.
- Steeper climbs and descents: Expect more elevation change with sections that test your endurance on the way up and your braking control on the way down.
- Tighter turns and switchbacks: Corners come quicker and sharper than on beginner trails to help riders refine cornering techniques and body positioning.
- Variable surfaces: The terrain can shift from packed dirt to loose gravel or exposed roots, requiring more focus and traction control.
- Perfect progression zone: Blue trails are ideal for riders who feel comfortable on green trails and want to take on a bit more challenge without stepping into advanced or expert territory.
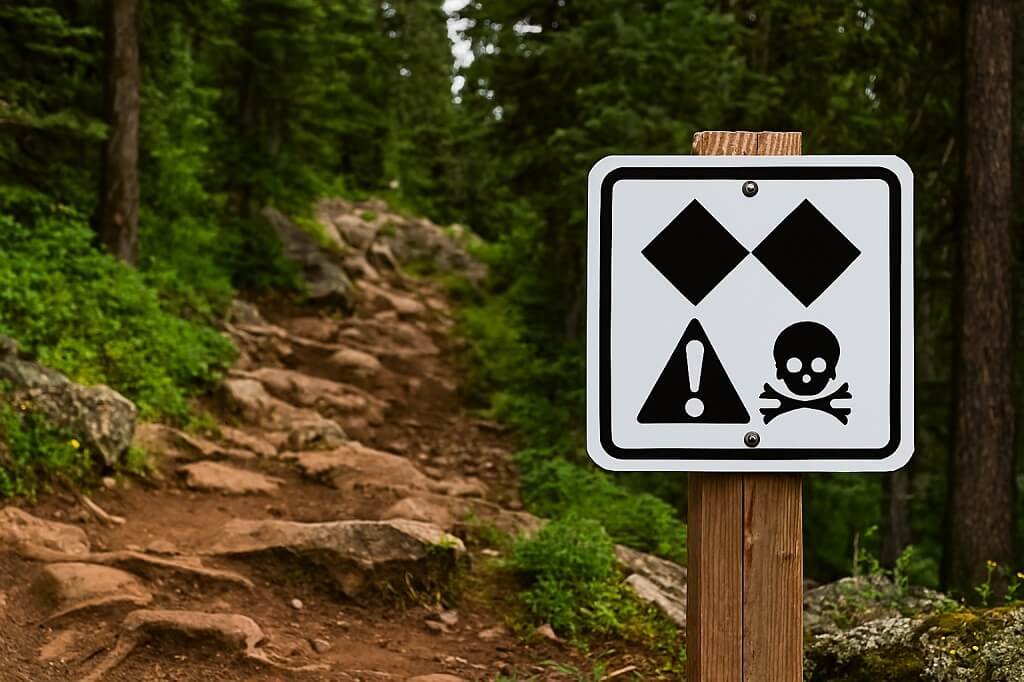
⬛ Black Diamond — Advanced Trails
This is where the real challenge begins. Black diamond trails are built for riders who crave technical, demanding terrain and have the skills — and gear — to handle it. These routes push your limits in both control and confidence.
What to expect:
- Steep, technical descents: Expect long downhill sections with sudden elevation drops, sharp turns, and little room for error. You’ll need precise braking and line choice to stay smooth and safe.
- Rock gardens and root sections: These trails are packed with natural obstacles that test balance, traction, and quick decision-making. Picking your line becomes just as important as maintaining speed.
- Drops and jumps: Some trails include built or natural drops that require proper technique and commitment. You should be comfortable getting your wheels off the ground and landing with control.
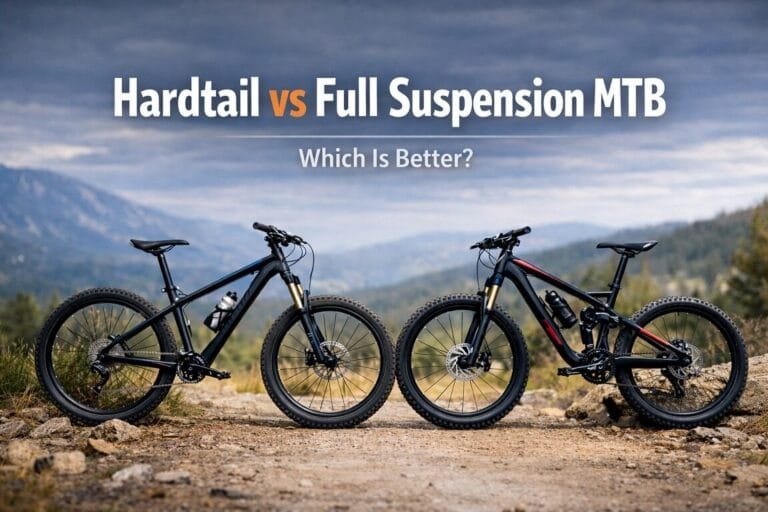
- Advanced gear requirements: A full-suspension mountain bike, dropper post, and aggressive tires are strongly recommended. Proper setup can make a big difference in comfort and handling.
- Trail readiness: Riders should know how to maintain a dropper post, check suspension pressure, and fine-tune rebound or compression settings before hitting these trails.

⬛⬛ Double Black Diamond — Expert Only
These trails are the pinnacle of technical riding — built to challenge even the most skilled riders. Double black diamond routes demand precision, control, and full confidence in your bike and abilities. They’re designed for experts who live for adrenaline and have the experience to manage serious risk.
What to expect:
- Extreme technical difficulty: These trails include mandatory drops, big jumps, off-camber roots, and exposed sections where mistakes can have real consequences. Every move requires focus and commitment.
- Aggressive terrain features: Expect large rock rolls, gap jumps, and sharp switchbacks that test your reaction time and control. Many sections offer no alternate lines or easy rollovers.
- Specialized environments: You’ll often find these trails in bike parks, high-alpine areas, or remote backcountry zones where conditions can change quickly and rescue access is limited.
- Protective gear required: A full-face helmet, body armor, knee and elbow pads, and gloves are essential. Riders should also carry tools, spare parts, and first aid supplies.
- Expert-level experience: These trails are best suited for advanced riders who can read terrain, scout lines before attempting features, and understand their limits. Confidence, precision, and preparation are key here.
🏞️ Other Symbols You Might See
Beyond the standard trail ratings, you’ll often spot a few extra symbols that help riders understand what type of terrain or riding style to expect. These markers give important clues about trail use, direction, and special features.
Common examples include:
- 🟠 Orange Oval — Freeride or Skills Park Features: This symbol marks areas designed for technical practice or advanced riding. Expect man-made obstacles such as wooden ramps, wall rides, drops, and jump lines. Freeride zones are perfect for honing your aerial skills and learning how to handle bigger features in a controlled environment.
- ⚪ White Circle with a Bike Icon — Shared-Use or Bike-Friendly Path: Trails with this marker are open to multiple user groups, such as hikers, runners, and bikers. These paths are wider and less technical, emphasizing cooperation and right-of-way etiquette. Always stay alert for others and maintain a safe, predictable speed.
- ➡️ Directional Arrows — One-Way Trails or Flow Direction: Arrows indicate the intended riding direction to keep traffic moving smoothly and safely. One-way trails are designed for consistent flow, with jumps, berms, and corners built to match the direction of travel. Riding the wrong way can be dangerous for both you and other riders.
💬 Real Talk: Ratings Aren’t Universal
Here’s something most riders don’t realize — trail ratings vary by region. A blue trail in Colorado might feel like a black in Florida. That’s because ratings are relative to local terrain and rider expectations. Always read trail descriptions, check recent reviews, and if possible, scout the trail before committing.
🌍 Regional Differences in MTB Trail Ratings
Here’s something most riders overlook: MTB trail ratings aren’t universal. That blue square you crushed in Arizona? It might feel like a black diamond in British Columbia. Why? Because trail ratings are relative to local terrain, rider expectations, and park standards.
🗺️ Why Ratings Vary by Region?
- Terrain type: Rocky desert trails vs. muddy forest singletrack
- Elevation and exposure: High-altitude trails often feel more intense
- Trail building philosophy: Some parks prioritize flow, others embrace raw tech
- Local rider skill level: What’s “intermediate” in Whistler might be “advanced” elsewhere
🏞️ IMBA Trail Rating System Explained
The International Mountain Bicycling Association (IMBA) created a standardized rating system to help riders navigate trails more consistently. Here’s how it works:
| Symbol | Rating | Description |
| 🟢 | Green Circle | Easiest — wide, stable, low-grade trails |
| 🔵 | Blue Square | Intermediate — moderate obstacles, tighter turns |
| ⚫ | Black Diamond | Advanced — steep, technical, exposed terrain |
| ⚫⚫ | Double Black | Expert — extreme features, mandatory drops, high risk |
🧠 Pro Tip: Don’t Trust the Symbol Alone
Always read the trail description, check recent reviews, and if possible, walk the first section. Apps like Trailforks and MTB Project often include rider feedback, photos, and even dropper post usage tips — which is key if you’re wondering how to maintain your dropper post on rough terrain.
🤝 Trail Etiquette & Safety Tips for MTB Riders
Mountain biking isn’t just about skill — it’s about respecting the trail, the community, and the environment. Whether you’re hitting a local loop or exploring a national park, following proper MTB trail etiquette keeps everyone safe and stoked.
🚶 Yield Rules: Who Has the Right of Way?
Knowing when to yield is one of the most important parts of trail etiquette. It keeps traffic flowing and prevents close calls.
- Bikers yield to hikers and horses: Always slow down, make eye contact if possible, and clearly announce yourself before passing. Give animals plenty of space — sudden movements or noise can spook them.
- Downhill riders yield to uphill riders: Climbing takes a lot of effort, so give ascending riders the right of way. Step aside or stop safely off the trail when descending.
- Pull over when stopping: If you need a break, move completely off the trail to keep it clear for others. Blocking the path, even briefly, can cause accidents or disrupt the flow of traffic.

🔊 Communication Is Key
Clear communication keeps everyone safe and makes the trail experience more enjoyable. A quick word or sound can prevent collisions, ease tension, and remind others that you’re part of a friendly, respectful riding community.
- Use a bell or call out when approaching others: If you’re coming up behind hikers or slower riders, give a gentle ring or a friendly “hey there!” well before you pass. It’s courteous and helps avoid startling anyone.
- Say “rider back” or “on your left” when passing: Simple phrases like these let others know where you are and what you’re doing. Always pass with enough space and only when it’s safe — never barge through tight spots.
- Offer help when someone’s struggling: Whether it’s a flat tire, a crash, or just fatigue, a quick offer to assist goes a long way. Mountain biking thrives on community spirit — everyone appreciates a hand when things get tough.
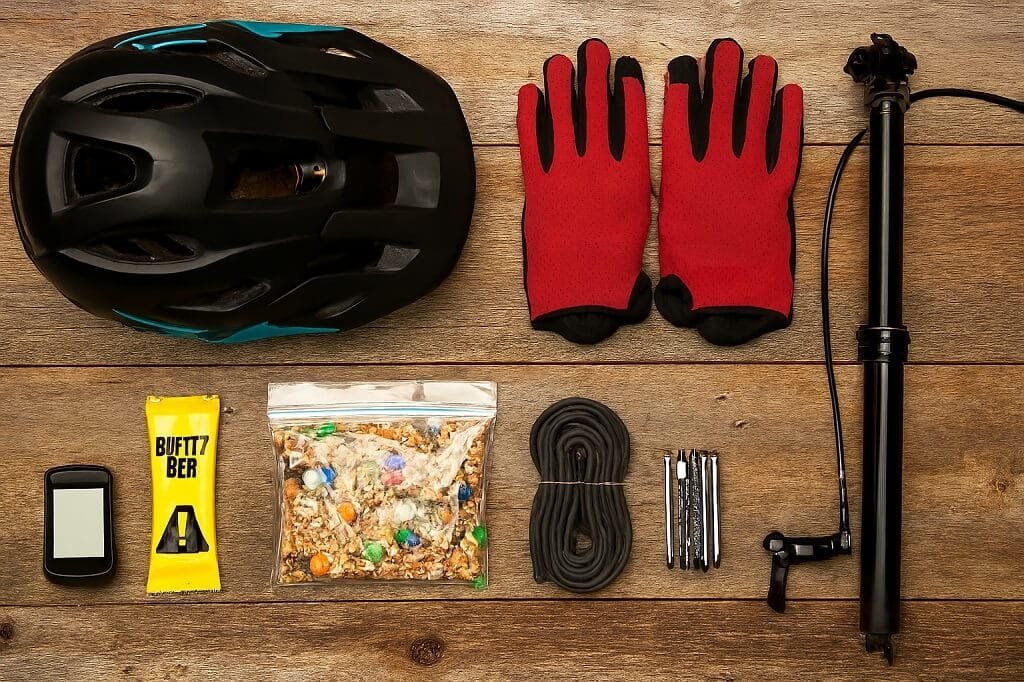
🛠️ Gear Check Before You Ride
A quick gear check before hitting the trail can make the difference between a smooth ride and a long walk back to the car. Taking a few minutes to inspect your setup ensures safety, performance, and peace of mind — especially on technical or remote trails.
- Inspect your brakes, tires, and suspension: Squeeze your brake levers to make sure they engage properly and don’t feel spongy. Check tire pressure and look for cuts or punctures. Give your suspension a quick bounce to confirm it’s responsive and not leaking oil.
- Maintain your dropper post: A well-functioning dropper post makes descents and technical sections far easier. Keep it clean, lubricated, and check for smooth travel. Knowing how to make quick adjustments on the trail helps prevent issues mid-ride.
- Pack the essentials: Always carry a multi-tool, spare tube or patch kit, a mini pump, and tire levers. Add water, a few energy snacks, and a compact first aid kit. These basics can turn a potential disaster into a minor pit stop.
🌿 Respect the Trail and Environment
Every ride is a chance to protect the places we love to explore. Good trail stewardship ensures that future riders — and other outdoor users — can enjoy the same clean, well-maintained paths. Treat the trail as part of the experience, not something to conquer.
- Stay on marked trails: Always ride within designated boundaries and resist the temptation to cut switchbacks or make your own shortcuts. Going off-route damages vegetation, widens trails, and leads to long-term erosion problems.
- Pack out trash — even if it’s not yours: Carry a small bag or pocket space for wrappers, bottles, or any litter you find. Leaving a trail cleaner than you found it is one of the simplest ways to give back to the riding community.
- Avoid riding in wet conditions: When trails are muddy, your tires can carve deep ruts that ruin drainage and create more maintenance work for volunteers. If conditions are too soft, choose a gravel path, road route, or wait until the trail dries out.
🧠 Know Your Limits
Confidence is key in mountain biking, but overconfidence can lead to crashes or injuries. Riding within your skill level isn’t about playing it safe — it’s about progressing smartly and keeping the stoke high for the long run.
- Don’t let ego override safety: If a section looks sketchy or beyond your comfort zone, stop and check it out first. Walking a feature is never a sign of weakness — it’s how smart riders learn and stay injury-free.
- Practice features in a controlled setting: Skills parks and pump tracks are perfect for working on drops, jumps, and cornering before you try them on the trail. Repetition builds muscle memory and confidence without the added pressure of tricky terrain.
- Use trail apps and resources: Apps like Trailforks or MTB Project let you preview trails, check elevation profiles, and read other riders’ feedback. Knowing what to expect helps you plan your ride wisely and avoid unpleasant surprises.

💬 Trail Etiquette FAQ
Can I ride a black diamond trail if I’m an intermediate rider?
Only attempt it if you’ve practiced similar features on blue or advanced trails and feel confident in your skills. Always scout tricky sections first on foot before committing to a ride.
What should I do if I encounter wildlife on the trail?
Stay calm, give animals plenty of space, and avoid sudden movements. Do not approach, feed, or attempt to interact with wildlife — it’s safer for both you and the animals.
Is it okay to ride with music?
Yes, but be mindful of your surroundings. Use a single earbud or a handlebar-mounted speaker so you can hear other riders, hikers, or emergency signals. Safety always comes first.
How often should I maintain my dropper post?
Check it monthly for smooth operation. After muddy or wet rides, clean the stanchion, inspect for dirt or grit, and lubricate as needed. Regular maintenance keeps your dropper reliable on technical descents.
🎒 Gear Recommendations by MTB Trail Rating
Choosing the right gear isn’t just about comfort — it’s about performance, safety, and confidence. The more technical the trail, the more dialed your setup needs to be. Here’s a breakdown of what to bring and how to prep based on trail difficulty.
🟢 Green Circle — Beginner Trails
Recommended Gear:
- Hardtail MTB with basic suspension
- Flat pedals for easy foot placement
- Helmet (standard trail lid is fine)
- Hydration pack or water bottle
- Basic repair kit: tire levers, multi-tool, spare tube
Optional but helpful:
- Lightweight gloves
- Sunglasses for dust and glare
- Phone with GPS apps (Trailforks, MTB Project)
🔵 Blue Square — Intermediate Trails
Recommended Gear:
- Full-suspension MTB or well-equipped hardtail
- Dropper post — helps with descents and technical sections
- Trail helmet with better coverage
- Protective gloves and knee pads
- Tubeless tires for better traction and fewer flats
- Trail snacks and electrolyte mix
⚫ Black Diamond — Advanced Trails
Recommended Gear:
- High-performance full-suspension MTB
- Aggressive tires with reinforced sidewalls
- Full-face helmet (optional but recommended)
- Knee and elbow pads
- Dropper post — essential for steep descents
- Brake check — inspect pads and rotors before riding
- First aid kit and emergency contact info
⚫⚫ Double Black Diamond — Expert Only
Recommended Gear:
- Enduro or downhill MTB with long-travel suspension
- Full-face helmet and body armor
- High-grip tires with low PSI for traction
- Dropper post — must be smooth and reliable
- Advanced tools: chain breaker, CO2 inflator, derailleur hanger
- Trail scouting tools: drone, GoPro, or buddy system
🧳 Universal Essentials for All Trails
- Multi-tool with chain breaker
- Mini pump or CO2 inflator
- Spare tube or tubeless plug kit
- Snacks and hydration
- Phone with GPS and emergency contacts
- Trail map or app screenshot
🗺️ How to Read MTB Trail Maps Like a Pro
Trail maps aren’t just for tourists — they’re your pre-ride strategy guide. Whether printed at the trailhead or loaded in an app like Trailforks, knowing how to interpret MTB trail maps can make or break your ride.
🧭 Key Elements of a Trail Map
- Trail names and ratings: Look for color-coded symbols (green circle, blue square, black diamond, double black diamond) next to each trail. These indicate difficulty levels and help you select trails suited to your skills.
- Distance and elevation: Check trail lengths and elevation gain to gauge how much effort and time the ride will require. This is crucial for planning breaks and energy management.
- Trail type: Note whether the route is one-way, a loop, out-and-back, or shared-use. This affects flow, congestion, and your approach to passing or yielding to others.
- Landmarks and amenities: Identify water sources, rest areas, parking, and emergency exits. Knowing where these points are located can be a lifesaver on longer rides or remote trails.

📈 Elevation Profiles Explained
Elevation profiles show the ups and downs of your ride. They’re especially useful for:
- Planning climbs and descents
- Estimating ride time and effort
- Choosing gear ratios and tire pressure
- Deciding when to use your dropper post — steep descents = drop it low
📱 Best Apps for MTB Trail Navigation
Using a trail navigation app can transform your ride from uncertain to well-planned and safe. These tools not only show maps but also provide trail ratings, conditions, and community insights to help you make smarter decisions on the trail.
- Trailforks: A community-driven platform with detailed trail maps, difficulty ratings, photos, and rider comments. Perfect for discovering new trails and checking conditions before you ride.
- MTB Project: Offers comprehensive maps, GPX downloads for offline navigation, and user reviews. Ideal for planning longer rides or exploring unfamiliar areas.
- Komoot: Great for route planning and multi-sport adventures. Provides turn-by-turn directions, elevation profiles, and customizable routes.
- Strava: Not just for tracking your performance — Strava lets you compare segments, analyze rides, and find popular trails in your area through its community features.
🧠 Map Reading Tips for Beginners
- Always check the legend — it explains symbols and color codes
- Use contour lines to estimate steepness
- Look for trail intersections and plan your route accordingly
- Screenshot the map before you lose signal
❓ MTB Trail Signs and Ratings FAQs
Whether you’re new to mountain biking or a seasoned rider exploring new terrain, questions about MTB trail signs, ratings, and gear setup come up all the time. Here’s a roundup of the most asked questions — with clear, practical answers.
What does a green circle trail really mean?
Green circle trails are the easiest MTB routes, designed for beginners and casual riders. Expect wide and smooth paths, minimal elevation change, and few technical features.
Is the blue square trail okay for beginners?
Not usually. Blue square trails are intermediate and may include, roots, rocks, & tighter turns, moderate climbs and descents, and features that require basic bike handling skills.
What makes a trail a black diamond?
Black diamond trails are advanced, with steep descents, technical terrain (rock gardens, drops, tight switchbacks), and mandatory gear: dropper post, full-suspension, protective pads
What’s the difference between black and double black diamond?
Double black diamond trails are expert-only. They feature mandatory jumps and drops, exposure (cliffs, narrow ledges), no ride-arounds — you commit or walk.
Are trail ratings consistent across regions?
Nope. A blue trail in one region might feel like a black in another. Ratings are relative to local terrain and rider expectations. Always check trail descriptions, rider reviews, and elevation profiles.
How often should I maintain my dropper post?
Monthly checks are ideal. Look for:
- Smooth operation
- No sticking or slow return
- Clean stanchion and lubricated seal
🚴 Can I ride a black diamond trail with a hardtail?
Technically yes, but not recommended. You’ll feel every bump, and your control will be limited. A full-suspension bike with a dropper post is much safer and more comfortable.
🧠 What if I’m unsure about a trail?
- Walk the first section
- Ask locals or check reviews
- Use apps to preview terrain
- Don’t be afraid to turn back — it’s smarter than crashing
🔍 Trail Scouting & Pre-Ride Rituals
Before you drop into a new trail, take a moment to scout, prep, and visualize. These pre-ride rituals aren’t just for pros — they’re for anyone who wants to ride smarter, avoid injury, and get the most out of their gear.
🧭 Trail Scouting Tips
- Walk the first section: Especially on black or double black diamond trails, get off the bike and walk the opening part. Identify tricky spots like drop zones, rock gardens, tight corners, or root sections. Visualizing lines beforehand gives you confidence and reduces surprises.
- Check signage: Confirm the trail rating, direction, and any posted warnings. Make sure you’re comfortable with the difficulty and aware of potential hazards.
- Use apps for intel: Tools like Trailforks and MTB Project provide rider comments, photos, and gear suggestions. Reading notes from other riders can highlight tricky sections or recommend the best lines.
- Visualize your ride: Mentally rehearse turns, drops, and braking points. This helps build muscle memory and keeps you calm when you actually ride the section.

🧠 Mental Prep Before the Ride
Mountain biking isn’t just a physical challenge — it’s a mental one too. Preparing your mind before you hit the trail helps you ride confidently, stay focused, and avoid unnecessary mistakes.
- Visualize the trail: Before riding, picture your line through corners, braking points, and gear shifts. Mentally rehearsing tricky sections reduces hesitation and builds confidence.
- Set realistic goals: Focus on achievable objectives for each ride, like “clean the rock garden” or “practice cornering.” Small wins add up and keep your progression steady.
- Ride your own pace: Avoid comparing yourself to others. Chasing faster riders can lead to mistakes and injuries. Stick to your rhythm and challenge yourself safely.
🛠️ Physical Prep & Gear Check
Being physically ready and ensuring your bike is in top shape are crucial steps before any ride. A few minutes of preparation can prevent injuries, improve performance, and make your ride more enjoyable.
- Stretch before riding: Focus on key areas like hips, hamstrings, shoulders, and lower back. Dynamic stretches warm up your muscles, improve flexibility, and reduce the risk of strains.
- Check your bike: Inspect tire pressure, brake pads, and suspension settings to ensure everything is functioning properly. Properly inflated tires and responsive brakes make an enormous difference in control and safety.
- Inspect your dropper post: Make sure it moves smoothly and locks securely. A well-maintained dropper post improves handling on technical descents and helps you maintain proper body positioning.
- Pack essentials: Don’t forget water, snacks, a multi-tool, spare tube, pump, and first aid supplies. Being prepared keeps you safe and confident on any trail.

🧳 What to Pack for Trail Scouting
- Mini pump or CO2 inflator
- Multi-tool with chain breaker
- Snacks and hydration
- Phone with GPS and emergency contacts
- Trail map or app screenshot
🏁 Conclusion: Ride Smarter, Not Harder
Trail signs aren’t just symbols — they’re your roadmap to better rides. By now, you’ve decoded the full spectrum of MTB trail signs and ratings — from green circles to double black diamonds, from directional arrows to freeride icons. You’ve learned how to read trail maps, prep your gear, scout terrain, and even how to maintain your dropper post for peak performance.
But here’s the real takeaway: trail signs are more than warnings — they’re invitations. They invite you to grow, to challenge yourself, and to ride with intention. Whether you’re just starting out or pushing expert lines, understanding these symbols helps you:
- Choose the right trail for your skill level
- Avoid injuries and mechanical failures
- Respect the trail and fellow riders
- Progress with confidence and control

✅ Final Gear Checklist by Trail Rating
| Trail Rating | Bike Type | Dropper Post | Protection | Essentials |
| Green | Hardtail | Optional | Helmet | Water, multi-tool |
| Blue | Full-sus or hardtail | Recommended | Helmet, gloves | Snacks, GPS |
| Black | Full-sus | Required | Pads, helmet | First aid, spare tube |
| Double Black | Enduro/DH | Mandatory | Full-face, armor | Emergency gear, scouting tools |