
Last Updated on August 19, 2024
Maintenance of a spinning reel is essential to keep your equipment optimal for long-term use: nothing is more unpleasant than having a reel that squeaks or scraps during a fishing trip! So it is essential to know how to clean a spinning reel perfectly.
For my part, I perform two different interviews:
- – An annual maintenance (overhaul and complete inspection)
- – Periodic maintenance (lubrication without dismantling)
A complete overhaul every year and 2-3 superficial lubrication (without dismantling) should be enough to guarantee good longevity. However, it is important to understand the difference between greasing and lubrication. Grease is generally used for gear parts that rotate relatively slowly while lubrication is used mainly for the bearings of parts that rotate faster!
Without further delay, let’s see how to clean a spinning reel like a professional.
How to Clean a Spinning Reel – Step by Step
I will therefore proceed step by step, I use rather simple basic equipment and everyone can start reviewing their spinning reel; you just need to be organized and in a clean environment. I start by gathering the equipment I will need on a work surface covered with paper towels:
Equipment for Maintaining Your Spinning Reel
- A flat screwdriver
- A Phillips screwdriver
- A water pump pliers
- The exploded view of your reel
- A brush
- Solvent (acetone or toluene)
- A clean cloth
- Cotton swabs
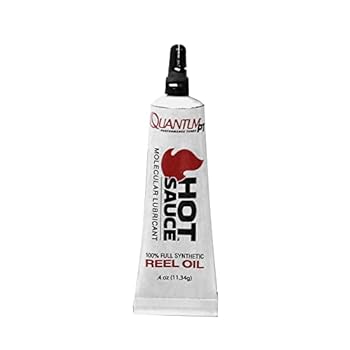
- Special reel grease and oil
After several tests remains the best for our reels: I therefore use the Quantum specialist Hot Sauce products for both grease and oil. The price is not given but comparatively inexpensive.
Find oil and grease at the best price HERE!
Dismantle the Handle and the Coil
After gathering the necessary materials, start by dismantling the handle and the coil. Here, no great difficulty, we have all done it at least once it seems to me.
Unscrew the Part
Then, depending on the model to remove the side cover, you will need to remove your rotor, that is nothing complicated! All you have to do is remove the screw (1) and then gently unscrew the brass nut. Once this operation has been carried out, the rotor should come out easily by the top.
Attention: on some models, the nut has one thread to the left!
You can therefore now unscrew the screws from your casing. Once again, each model is different both in terms of the position of the screws and their number. After the side cover is removed, you should have your reel as in the photo below:

Use Brush and Solvent to Remove the Old Grease
With a brush and solvent, you can easily remove the old grease. You then refine the work with a cotton swab. All the old grease must be removed. The solvent has the property of degreasing effectively but also evaporating very quickly and leaving your mechanics dry and clean!
The maintenance of a spinning reel goes through good lubrication, the mistake is putting in too much grease… A small drop deposited in strategic places will be enough to grease the whole mechanism during the first turns of the handle. One of the advantages of hot sauce grease is its red color, which can be spotted very quickly!
Lubricate the Spinning Reel
Now you need to reassemble the side casing and then move on to lubricating the bearings! For this model, I grease the handle bearings from the outside of the housing, and the center bearing will be greased from the top. A drop of oil is enough to maintain your reel (I also perform this step during my periodic maintenance!)
Oil the Bearings of Your Spinning Reel
Cleaning, greasing and lubrication have been carried out properly, now you need to tackle the dismantling of the rotor and its pick-up. The pick-up and particularly the roller often contains a bearing; it will be necessary to put a small drop of oil after cleaning it.
The Reassembly of a Reel After Its Maintenance!
You reassemble the roller, pick-up, and rotor assembly, then you need to position it on the reel without forgetting the brass nut and the screw. Now let’s move on to the maintenance of the coil and its braking system. Nothing complicated here, it’s basically cleaning!
- Remove the circlip (be careful not to lose it during removal as it works a bit like a spring).
- Proceed to disassemble the brake discs while keeping the direction of reassembly in mind.
Clean the Drag of a Reel and Its Spool!
All you have to do is reassemble your drag in the spool and then your spool on the reel. I usually take the opportunity to inspect the fluorocarbon and the braid. During the maintenance of a reel, I systematically replaced the fluorocarbon and I cut the last ten meters of braid (often discolored by the sun for that matter).
For this guide, I completely changed my braid! You can also find this video very useful:
Conclusion
There you go, your reel is like new and has been used for several dozen hours! The maintenance of a reel can also allow you to identify defective or end-of-life parts such as bearings for example. Do not hesitate to change them! With the maintenance of a strict and regular reel, your machine should accompany you at the water’s edge for several more years.
You should also visit my guide on how to choose the right size spinning reel.